Getting Started
Follow these steps to setup your Beepy. Out of the box, the display will only show static. If you see yellow lines on the display, that is the screen protector and can be removed.
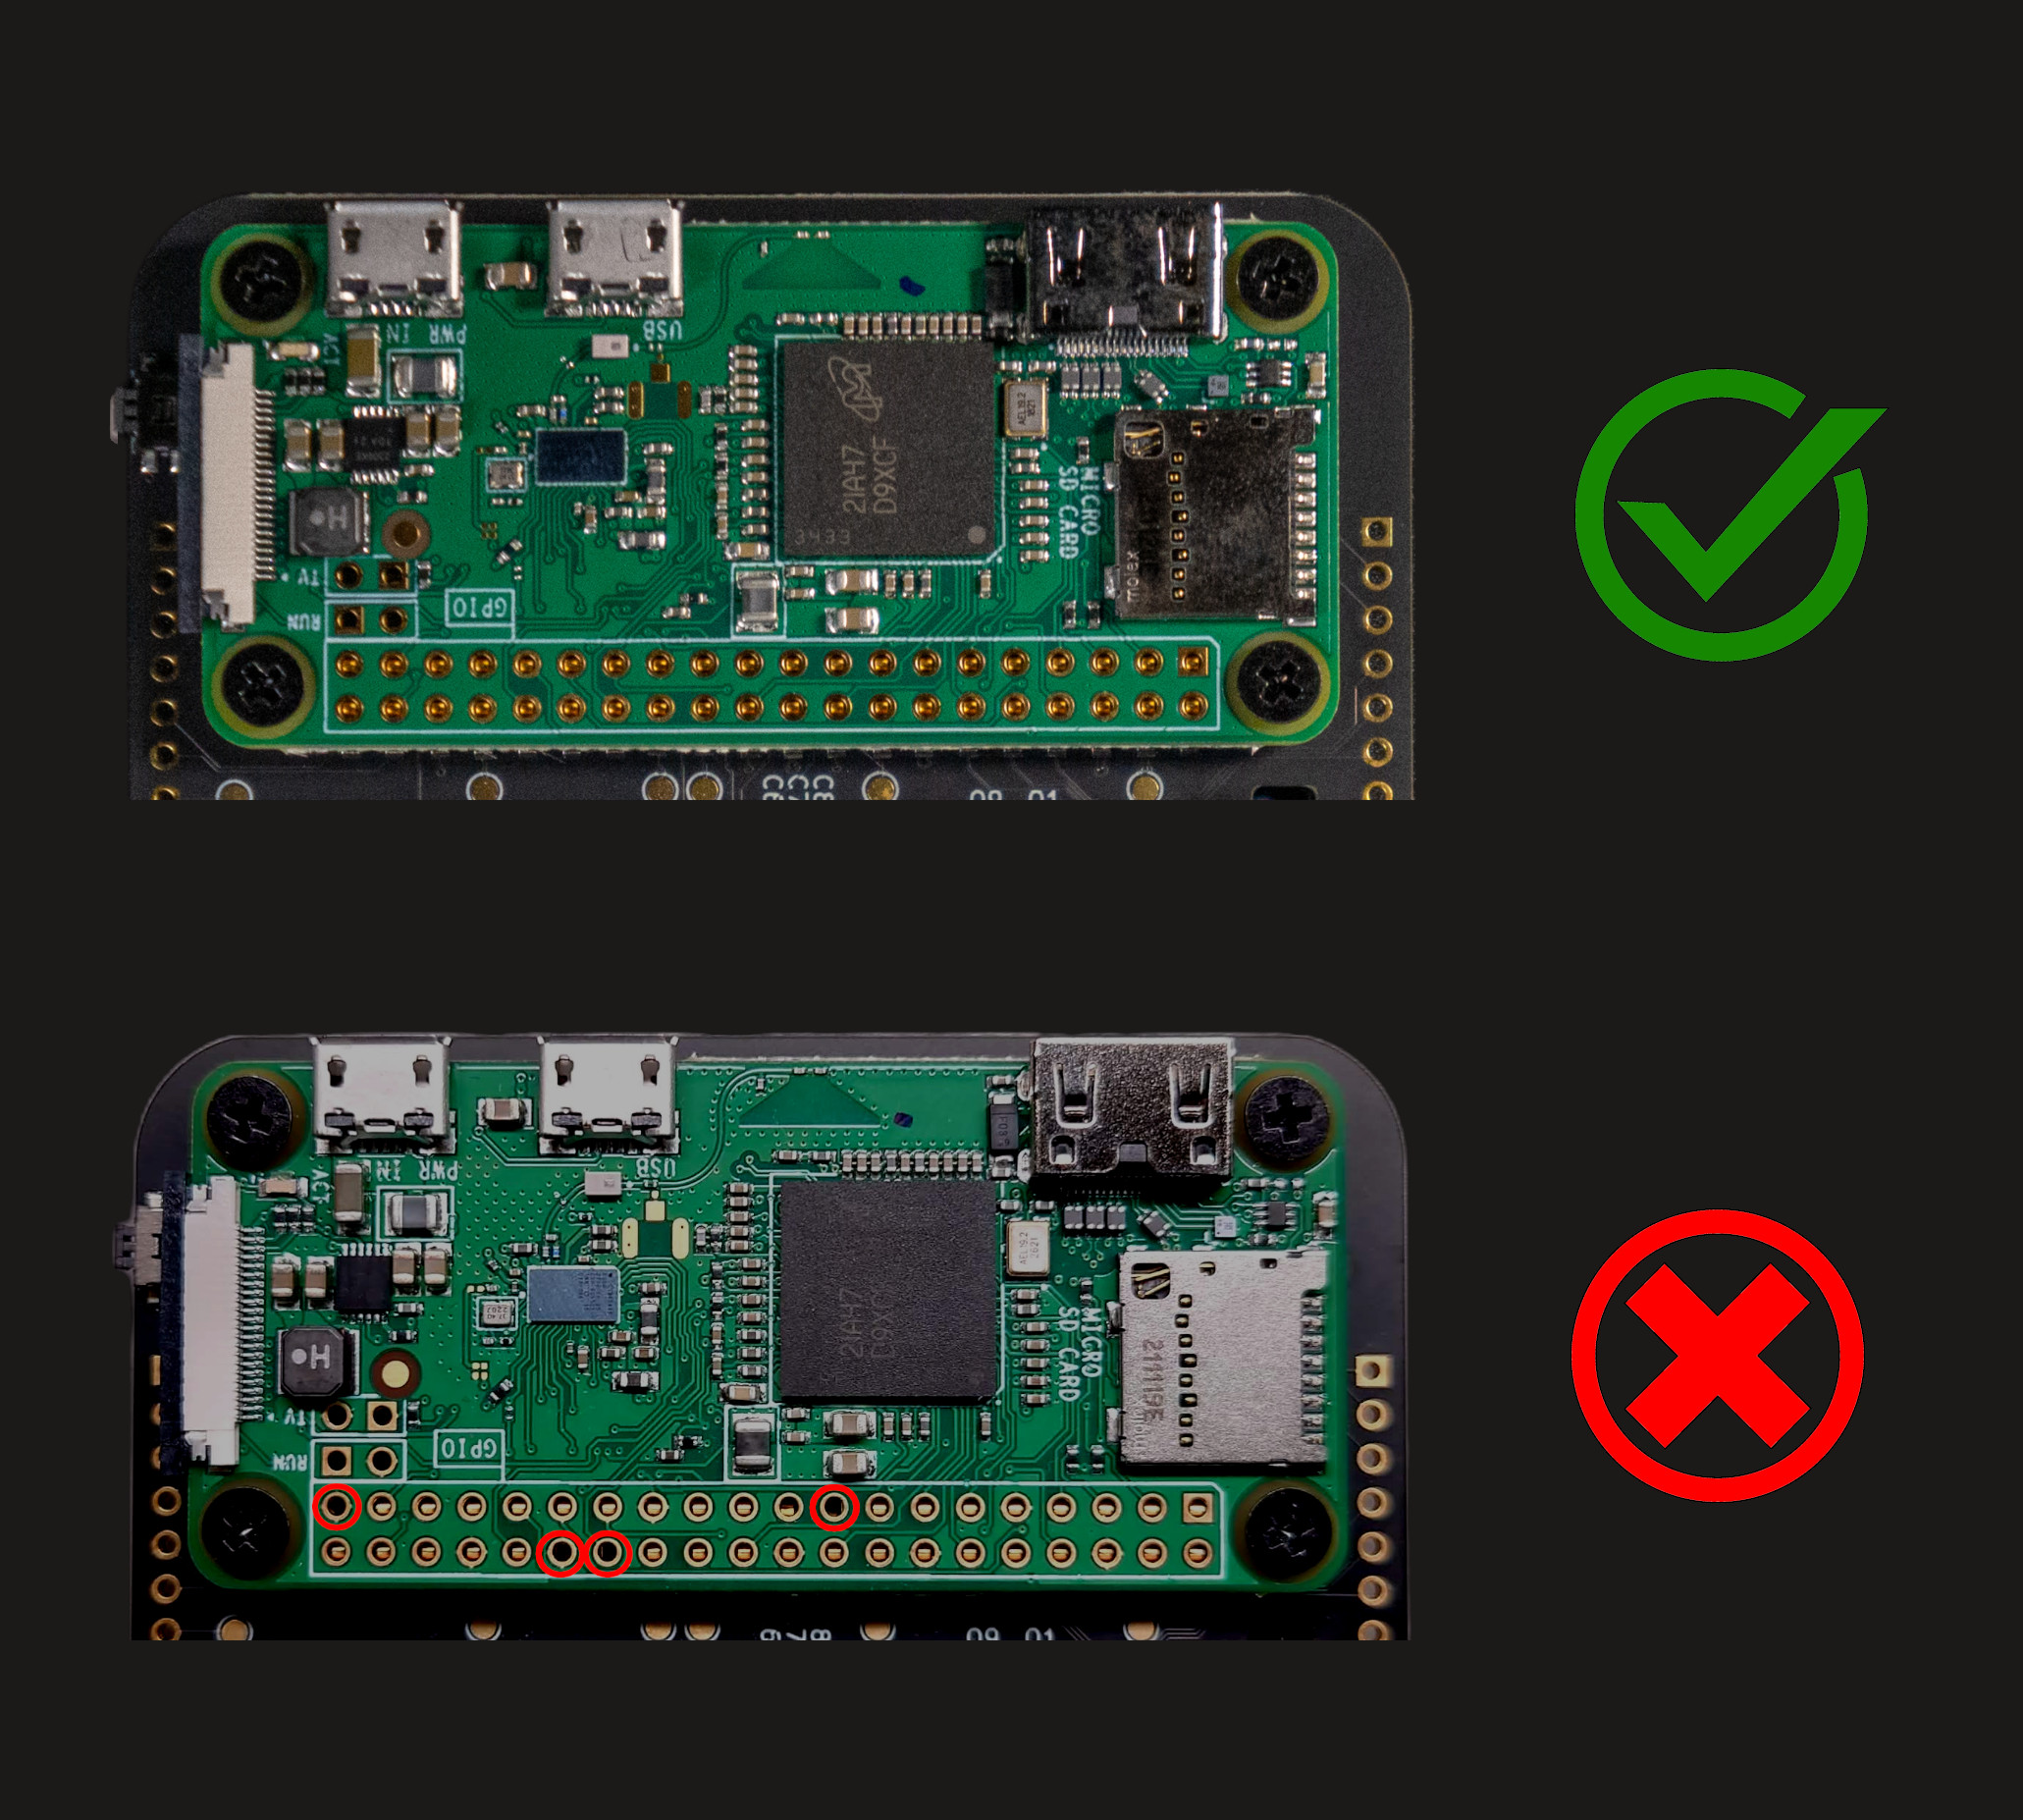
1. Hardware Setup
If you are installing your own Raspberry Pi Zero or any other SBC, make sure all the mounting pins are properly aligned to each hole before tightening the screws. If you cannot see the pin through a header hole, then it is not properly mounted. You can move the board around until all the pins "click" into place. You can skip this step if the Pi is already pre-installed.
The USB-C port at the bottom powers and charges the Beepy. Do not power the Raspberry Pi Zero through its Micro-USB port (PWR IN).
2. Firmware Update
Update Beepy's firmware to ensure driver compatibility and the latest device features:
- Download the latest firmware image
- Slide the power switch off (left if facing up)
- Connect the Beepy to your computer via USB-C
- While holding the "End Call" key (top right on the keypad), slide the power switch on
- The Beepy will present itself as a USB mass storage device, drag'n'drop the new firmware (i2c_puppet.uf2) into the drive and it will reboot with the new firmware
- Note: The LED will remain green until the driver packages below are installed and the system has rebooted
3. Choose an Operating System
There are two choices of operating systems to run on your Beepy
- Raspbian: a powerful, customizable distribution with all the bells and whistles
- Buildroot: a slimmed-down, Beepy-centric image with a fast boot
Setting up a Raspbian System
Use the Raspberry Pi Imager tool to flash an SD card with the Raspberry Pi OS Lite image
- Choose OS - Raspberry Pi OS (other) - Raspberry Pi OS Lite (32-bit) image
- Click the gear icon ⚙ (or press
CTRL + SHIFT + X) to set the username, password, hostname, WiFi, and enable SSH - Make sure your computer and the Pi are on the same WiFi network in order to SSH in later
SSH into your Beepy and install the driver packages
curl -s --compressed "https://ardangelo.github.io/beepy-ppa/KEY.gpg" | gpg --dearmor | sudo tee /etc/apt/trusted.gpg.d/beepy.gpg >/dev/null \
&& sudo curl -s --compressed -o /etc/apt/sources.list.d/beepy.list "https://ardangelo.github.io/beepy-ppa/beepy.list" \
&& sudo apt update \
&& sudo apt-get -y install beepy-kbd sharp-drm \
&& sudo shutdown -r now
Your Beepy with is now ready, enjoy!
- Review the default symbol keymap
Setting up a Buildroot System
Buildroot is a slimmed-down, Beepy-centric image with a fast boot, compatible with the Raspberry Pi Zero 2 W. It is automatically set up with Beepy device drivers and a set of useful software. Tailored for on-the-go communication, it ships with the following applications:
gomuks- Beeper command line clientmosh- Mobile remote shellw3m- Text based browseraerc- Command line email clientnmtui- Network management- Python 3
To use the Beepy Buildroot image, download and flash the latest release here:
https://github.com/ardangelo/beepberry-buildroot/releases
The initial boot will take about 30 seconds to resize disk partitions to fill your SD card. Subsequent boots take around 8 seconds from power-on to Tmux.
- Configure timezone: edit
/boot/timezone.txt - Configure Wi-Fi: use
nmtuior edit/boot/wlan/<your_network_name>.psk - Updating Buildroot image: reflash SD card, or run
sudo update_buildroot
Review the default symbol keymap
Powering on/off your Beepy
Long holding the "End Call" key (5 seconds) will trigger the key KEY_POWER and safely shutdown the Pi. The LED will turn red until OS shutdown has completed.
Please wait another few seconds until the disk activity light has turned off to ensure disks are synced.
After shutting down using the "End Call" key, holding the key for 1 second will turn the Pi back on.
Changing Font Size
In /boot/cmdline.txt, edit fbcon=font:VGA8x8 to change the font/size. The next largest size is VGA8x16. See fbcon for more details.